
Page 135 - luminar 2018 - user manual pc v 2_3.pages
P. 135
Saving & Exporting Files
As you work with digital images, at some point you’ll reach a point where saving a file is a good
idea. It might be an in-progress save to capture work to date as you edit a photo. Perhaps it’s to
prepare a file for printing or sharing on the Internet. Or maybe an export to social media. Luminar
offers many different options for saving and exporting images to meet your needs.
Saving a Native Luminar File for Future Edits
As you design using layers, filters, and masks… it’s a good idea to capture that work from time-to-
time. To make this easy, Luminar offers a native file format, the Luminar project file (its file extension
is .lmnr).
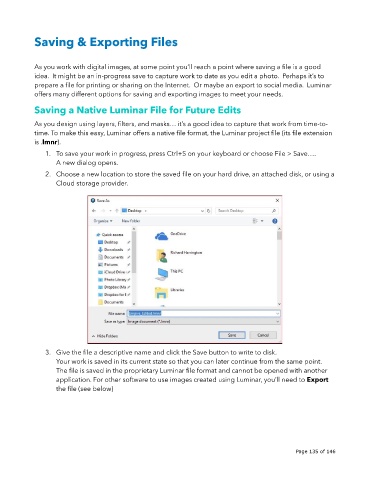
1. To save your work in progress, press Ctrl+S on your keyboard or choose File > Save….
A new dialog opens.
2. Choose a new location to store the saved file on your hard drive, an attached disk, or using a
Cloud storage provider.
3. Give the file a descriptive name and click the Save button to write to disk.
Your work is saved in its current state so that you can later continue from the same point.
The file is saved in the proprietary Luminar file format and cannot be opened with another
application. For other software to use images created using Luminar, you’ll need to Export
the file (see below)
!
!
Page 135 of 146