
Page 568 - Workshop Manual - Aumark (BJ1051)
P. 568
11-14
Fuel-Fuel sensor
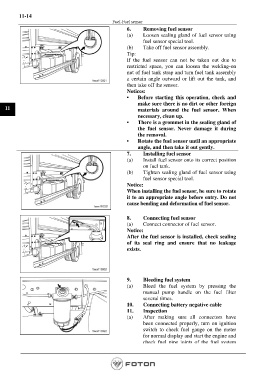
6. Removing fuel sensor
(a) Loosen sealing gland of fuel sensor using
fuel sensor special tool.
(b) Take off fuel sensor assembly.
Tip:
If the fuel sensor can not be taken out due to
restricted space, you can loosen the welding-on
nut of fuel tank strap and turn fuel tank assembly
a certain angle outward or lift out the tank, and
then take off the sensor.
Notices:
• Before starting this operation, check and
make sure there is no dirt or other foreign
11 materials around the fuel sensor. When
necessary, clean up.
• There is a grommet in the sealing gland of
the fuel sensor. Never damage it during
the removal.
• Rotate the fuel sensor until an appropriate
angle, and then take it out gently.
7. Installing fuel sensor
(a) Install fuel sensor onto its correct position
on fuel tank.
(b) Tighten sealing gland of fuel sensor using
fuel sensor special tool.
Notice:
When installing the fuel sensor, be sure to rotate
it to an appropriate angle before entry. Do not
cause bending and deformation of fuel sensor.
8. Connecting fuel sensor
(a) Connect connector of fuel sensor.
Notice:
After the fuel sensor is installed, check sealing
of its seal ring and ensure that no leakage
exists.
9. Bleeding fuel system
(a) Bleed the fuel system by pressing the
manual pump handle on the fuel filter
several times.
10. Connecting battery negative cable
11. Inspection
(a) After making sure all connectors have
been connected properly, turn on ignition
switch to check fuel gauge on the meter
for normal display and start the engine and
check fuel pipe joints of the fuel system
for oil ooze and leak.
Page 568