
Page 28 - fif pnim
P. 28
25566_eyal-Y-MK1-550 - 25566_pnim_Y-MK1-550.1 | 1 - B | 18-06-11 | 09:04:00 | SR:-- | Cyan
#25566_eyal-Y-MK1-550 - 25566_pnim_Y-MK1-550.1 | 1 - B | 18-06-11 | 09:04:00 | SR:-- | Black
25566_eyal-Y-MK1-550 - 25566_pnim_Y-MK1-550.1 | 1 - B | 18-06-11 | 09:04:00 | SR:-- | Yellow
25566_eyal-Y-MK1-550 - 25566_pnim_Y-MK1-550.1 | 1 - B | 18-06-11 | 09:04:00 | SR:-- | Magenta
#
7.1. Battery Replacement 6.5.3. Over-instrumentation
The battery compartment is located at the bottom of CanalPro Apex Locator and its cover is secured by a A red “Blood drop” and warning sound indicate that the file has passed the Apex. Numerical
screw. values changing from +0.1 to +0.5 (Pic. 12 and Pic. 13) indicate relative depth of over-instru-
mentation, then “OVER” reading appears. (Pic. 14).
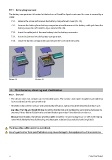
7.1.1. Release the screw and remove the battery compartment cover (Pic. 19).
7.1.2. Remove the battery from battery compartment and disconnect the battery cable jack from the
battery connector of CanalPro Apex Locator (Pic. 20).
7.1.3. Insert the cable jack of the new battery into the battery connector.
7.1.4. Insert the battery into the battery compartment.
7.1.5. Close the battery compartment and secure the cover with the screw.
english
Picture 12 Picture 13 Picture 14
6.6. Audio feedback
CanalPro Apex Locator is equipped with a audio indicator which enables monitoring of the progression
of the file within the canal in the apical zone.
Picture 19 Picture 20 This function, is activated in parallel with Apical Zoom display and enables monitoring of file advance in
the apical zone, even without seeing the display.
The volume can be adjusted to one of four levels: mute, low, normal and high, by successive pressings of
the volume key.
8. Maintenance, cleaning and sterilization
8.1. General
6.7. Virtual Apex
• The device does not contain user serviceable parts. The service and repair should be provided by
factory trained service personnel only. Virtual apex enables to mark a predetermined position at the required distance from the apex. When
Virtual Apex feature is enabled, the dentist gets clear visual and audio indication that the file tip has
• All objects that were in contact with potentially infectious agents should be cleaned after each use: reached the selected position near the Apex.
Lip Clip, File Clip and Touch Probe should be disinfected and sterilized by autoclaving between tre- To activate Virtual Apex feature or to modify Virtual Apex mark position, follow the next steps:
atments. Please follow “Disinfection and sterilization procedure” described in section 8.2.
6.7.1. Press and hold the MODE button for about 1 sec. until the beep sounds and Virtual Apex mark
Measurement cable, the device and its cradle should be cleaned using tissue or soft cloth impreg- is blinking on the screen. (Blinking “0” mark with adjacent red line inside the canal indicates
nated with aldehyde free disinfecting and detergent solution (a bactericidal and fungicidal). that Virtual Apex was previously disabled).
6.7.2. Press the MODE button to select Virtual Apex position (0.1 to 1.0 marks of the scale). To confirm
The measuring cable cannot be autoclaved. your selection press and hold the MODE button for about 1 sec. until beep sounds and the Vir-
tual Apex mark stops blinking.
Use of agents other than specified above may cause damage to the equipment and its accessories
6.7.3. To disable Virtual Apex feature, Press and hold the MODE button for about 1 sec, proceed to
the mark “0”, press and hold the MODE button again.
28 25