
Page 105 - Patty Hahne "The Pocket Guide to Prepper Knots"
P. 105
2. Next, pass the working end in front of the standing part
as illustrated in figure 26b.
3. Thread the working end through the loop you created
and pull the first half hitch tight as illustrated in figure
26c. Note that this is simply an overhand knot that is
tied around something.
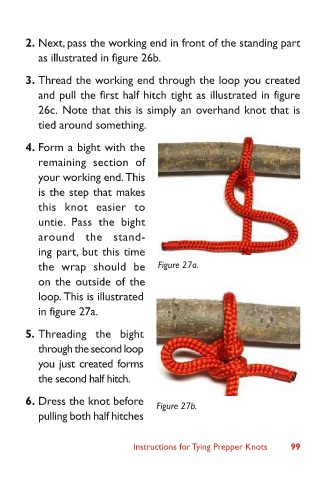
4. Form a bight with the
remaining section of
your working end. This
is the step that makes
this knot easier to
untie. Pass the bight
around the stand-
ing part, but this time
the wrap should be Figure 27a.
on the outside of the
loop. This is illustrated
in figure 27a.
5. Threading the bight
through the second loop
you just created forms
the second half hitch.
6. Dress the knot before Figure 27b.
pulling both half hitches
Instructions for Tying Prepper Knots 99