
Page 119 - Patty Hahne "The Pocket Guide to Prepper Knots"
P. 119
loop” in your rope that can easily be untied when you
want to use the rope for something else in the future.
Essentially, this is just an overhand knot with a bight in
it. Figure 30d illustrates this step.
5. Now take the working end and make a single turn around
a stationary object to act as an opposing anchor point to
the one the standing end is tied to.
6. Pass the working end through the loop you created in
step 4.
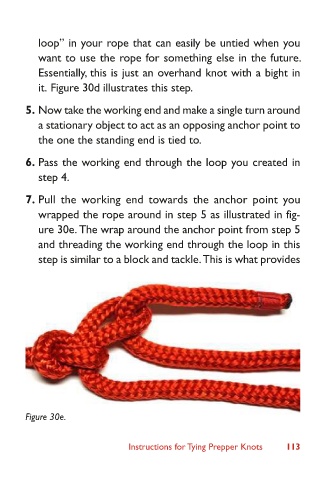
7. Pull the working end towards the anchor point you
wrapped the rope around in step 5 as illustrated in fig-
ure 30e. The wrap around the anchor point from step 5
and threading the working end through the loop in this
step is similar to a block and tackle. This is what provides
Figure 30e.
Instructions for Tying Prepper Knots 113