
Page 73 - Patty Hahne "The Pocket Guide to Prepper Knots"
P. 73
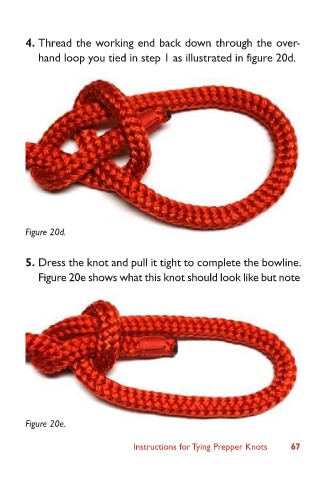
4.  Thread the working end back down through the over-
              hand loop you tied in step 1 as illustrated in figure 20d.


            Figure 20d.


            5.  Dress the knot and pull it tight to complete the bowline.
              Figure 20e shows what this knot should look like but note


            Figure 20e.

                                Instructions for Tying Prepper Knots         67