
Page 114 - Act! Marketing Automation User Guide
P. 114
Drip Marketing Act! v21
Make sure to choose Create Opportunity as the Action Type.
NOTE: If you would like more information on what an Opportunity is or how to work with
them in Act!, please see the following video library: http://training-act.com/act/act-lib-
prem/?courseId=opportunities&.
From here there are various fields to complete for the automatically generated Opportunity.
The first field allows you to specify which user will be the record manager for the newly
created Opportunity. The value you chose here will depend how you manage your
Opportunities in Act!. For example, if you want the record manager of the individual contact
to also manage the Opportunity, choose a value of Use Account Manager. If however
there is a specific individual in your company that manages your Opportunities (this could
of course be different for each Drip marketing campaign that you create), choose that
specific user from the dropdown list.
The second field allows you to choose the Sales Process that you want to apply to the
automatically created Opportunity. This is something you should make sure you have set
up in Act! before you get to this step of your campaign (you may even want to create a
process specifically for this AMA campaign). Once you have chosen this, you will then be
able to pick the specific Stage within the Sales Process.
You then need to specify a Name for the Opportunity that will be created. This means that
many Opportunities will be created with the same name, but that is useful as it allows you
to easily search for all of the Opportunities created as a result of this campaign. Because
of that it is important that you make sure the name here relates to the specific campaign.
Finally you can add a Reason here as well. The Reason field is specific to Opportunities
and allows you to add some specifics about why this Opportunity has been created. This
would allow you to potentially create several different Opportunity steps in your workflow
and enter a different reason each time.
Once you have completed the form, click Save.
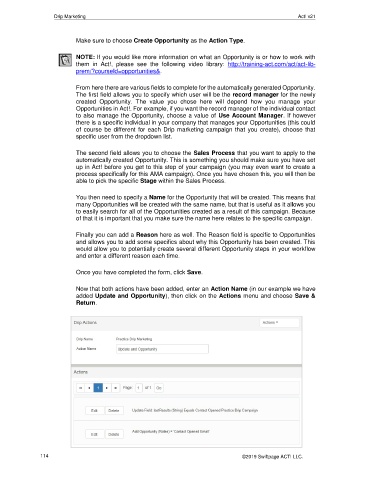
Now that both actions have been added, enter an Action Name (in our example we have
added Update and Opportunity), then click on the Actions menu and choose Save &
Return.
114 ©2019 Swiftpage ACT! LLC.