Page 199 - 8170 Money Builder Binder for Owner_Neat
P. 199

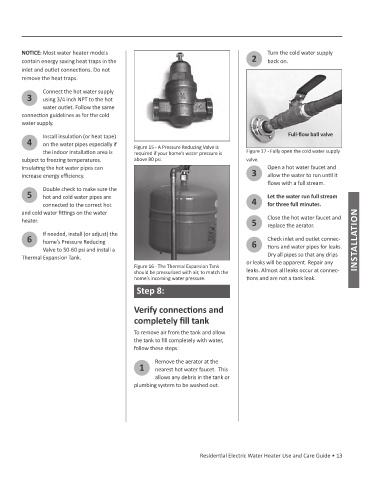
NOTICE: Most water heater models                                                  Turn the cold water supply
        contain energy saving heat traps in the                                     2     back on.
        inlet and outlet connecƟ ons. Do not
        remove the heat traps.
               Connect the hot water supply
          3    using 3/4 inch NPT to the hot

               water outlet. Follow the same
        connecƟ on guidelines as for the cold
        water supply.

               Install insulaƟ on (or heat tape)                                                Full-Ň ow ball valve
          4    on the water pipes especially if
                                             Figure 15 -രA Pressure Reducing Valve is
               the indoor installaƟ on area is   required if your home’s water pressure is   Figure 17 -രFully open the cold water supply
        subject to freezing temperatures.    above 80 psi.                         valve.
        InsulaƟ ng the hot water pipes can                                               Open a hot water faucet and
        increase energy eĸ  ciency.                                                 3     allow the water to run unƟ l it
                                                                                          Ň ows with a full stream.
               Double check to make sure the
          5    hot and cold water pipes are                                              Let the water run full stream

               connected to the correct hot                                         4     for three full minutes.
        and cold water Į ƫ  ngs on the water
                                                                                         Close the hot water faucet and
        heater.                                                                     5     replace the aerator.

               If needed, install (or adjust) the
          6    home’s Pressure Reducing                                             6    Check inlet and outlet connec-  INSTALLATION
               Valve to 50-60 psi and install a                                           Ɵ ons and water pipes for leaks.
                                                                                          Dry all pipes so that any drips
        Thermal Expansion Tank.
                                                                                   or leaks will be apparent. Repair any
                                             Figure 16 -രThe Thermal Expansion Tank
                                             should be pressurized with air, to match the   leaks. Almost all leaks occur at connec-
                                             home’s incoming water pressure.       Ɵ ons and are not a tank leak.
                                              Step 8:


                                             Verify connecƟ ons and
                                             completely Į ll tank

                                             To remove air from the tank and allow
                                             the tank to Į ll completely with water,
                                             follow these steps:

                                                    Remove the aerator at the
                                               1    nearest hot water faucet.  This
                                                    allows any debris in the tank or
                                             plumbing system to be washed out.


                                                                   ResidenƟ al Electric Water Heater Use and Care Guide • 13
   194   195   196   197   198   199   200   201   202   203   204