
Page 23 - QuickFire® Wrap Around Signature® Series
P. 23
QUICKFIRE® Signature ® Series
Installation
Installing Boom Components
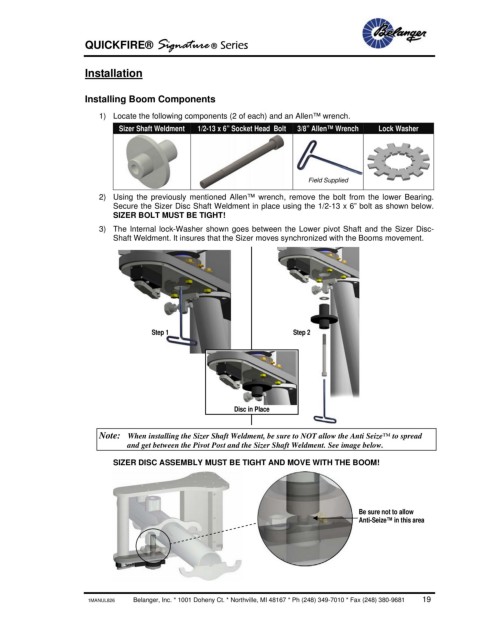
1) Locate the following components (2 of each) and an Allen™ wrench.
Sizer Shaft Weldment 1/2-13 x 6” Socket Head Bolt 3/8” Allen™ Wrench Lock Washer
Field Supplied
2) Using the previously mentioned Allen™ wrench, remove the bolt from the lower Bearing.
Secure the Sizer Disc Shaft Weldment in place using the 1/2-13 x 6” bolt as shown below.
SIZER BOLT MUST BE TIGHT!
3) The Internal lock-Washer shown goes between the Lower pivot Shaft and the Sizer Disc-
Shaft Weldment. It insures that the Sizer moves synchronized with the Booms movement.
Step 1 Step 2
Disc in Place
Note: When installing the Sizer Shaft Weldment, be sure to NOT allow the Anti Seize™ to spread
and get between the Pivot Post and the Sizer Shaft Weldment. See image below.
SIZER DISC ASSEMBLY MUST BE TIGHT AND MOVE WITH THE BOOM!
Be sure not to allow
Anti-Seize™ in this area
1MANUL826 Belanger, Inc. * 1001 Doheny Ct. * Northville, MI 48167 * Ph (248) 349-7010 * Fax (248) 380-9681 19