
Page 135 - Microsoft Word - LessonPlan-Overview.doc
P. 135
Unit 4: Energy (Part 1) Page 14
Activities, Experiments, Projects
Lesson 1: Levers
Note: This section is an abbreviated overview of the experiments online.
Be careful with this. Don’t use
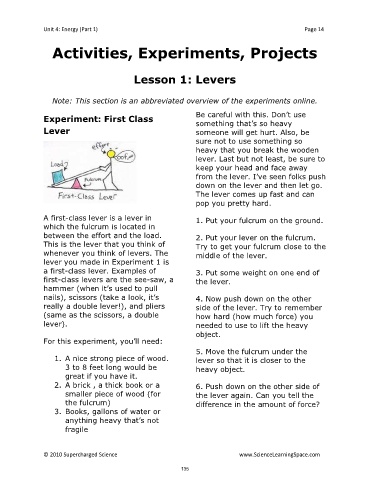
Experiment: First Class
something that’s so heavy
Lever someone will get hurt. Also, be
sure not to use something so
heavy that you break the wooden
lever. Last but not least, be sure to
keep your head and face away
from the lever. I’ve seen folks push
down on the lever and then let go.
The lever comes up fast and can
pop you pretty hard.
A first-class lever is a lever in 1. Put your fulcrum on the ground.
which the fulcrum is located in
between the effort and the load. 2. Put your lever on the fulcrum.
This is the lever that you think of Try to get your fulcrum close to the
whenever you think of levers. The middle of the lever.
lever you made in Experiment 1 is
a first-class lever. Examples of 3. Put some weight on one end of
first-class levers are the see-saw, a the lever.
hammer (when it’s used to pull
nails), scissors (take a look, it’s 4. Now push down on the other
really a double lever!), and pliers side of the lever. Try to remember
(same as the scissors, a double how hard (how much force) you
lever). needed to use to lift the heavy
object.
For this experiment, you’ll need:
5. Move the fulcrum under the
1. A nice strong piece of wood. lever so that it is closer to the
3 to 8 feet long would be heavy object.
great if you have it.
2. A brick , a thick book or a 6. Push down on the other side of
smaller piece of wood (for the lever again. Can you tell the
the fulcrum) difference in the amount of force?
3. Books, gallons of water or
anything heavy that’s not
fragile
© 2010 Supercharged Science www.ScienceLearningSpace.com
135