
Page 448 - Divyank Tyagi
P. 448
414 | ChaPter 10 Working With Phasing, grouPs, and design oPtions
Use a Phase Filter to Start Design Options
here’s a great tip: to isolate what you need to assign to option 1, activate the Phase 2 floor plan,
and then set the Phase Filter property to show new. This will turn off any existing conditions from
the previous phases.
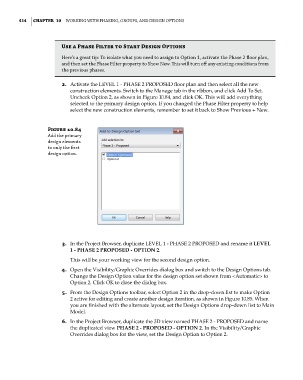
2. Activate the LEVEL 1 - PHASE 2 PROPOSED floor plan and then select all the new
construction elements. Switch to the Manage tab in the ribbon, and click Add To Set.
Uncheck Option 2, as shown in Figure 10.84, and click OK. This will add everything
selected to the primary design option. If you changed the Phase Filter property to help
select the new construction elements, remember to set it back to Show Previous + New.
Figure 10.84
add the primary
design elements
to only the first
design option.
3. In the Project Browser, duplicate LEVEL 1 - PHASE 2 PROPOSED and rename it LEVEL
1 - PHASE 2 PROPOSED - OPTION 2.
This will be your working view for the second design option.
4. Open the Visibility/Graphic Overrides dialog box and switch to the Design Options tab.
Change the Design Option value for the design option set shown from <Automatic> to
Option 2. Click OK to close the dialog box.
5. From the Design Options toolbar, select Option 2 in the drop-down list to make Option
2 active for editing and create another design iteration, as shown in Figure 10.85. When
you are finished with the alternate layout, set the Design Options drop-down list to Main
Model.
6. In the Project Browser, duplicate the 3D view named PHASE 2 - PROPOSED and name
the duplicated view PHASE 2 - PROPOSED - OPTION 2. In the Visibility/Graphic
Overrides dialog box for the view, set the Design Option to Option 2.
c10.indd 414 5/3/2014 11:05:07 AM