
Page 768 - Divyank Tyagi
P. 768
734 | ChaPteR 17 Documenting Your Design
Select the Outline check box and set the Outline drop-down to Wide Lines.
Once you’ve worked through each of the tabs in the Schedule Properties dialog box, click
OK and you will see the working layout of the schedule. The schedule settings can be modified
at any time, but this gives you a basis from which to begin. To modify the schedule, you can
access any tab of the Schedule Properties dialog box from the five corresponding buttons in the
Properties palette when the schedule view is active.
A special tab on the ribbon is active when you are editing a schedule. This ribbon is not
available when you select a schedule that has been placed on a sheet but rather only in the
editing mode. To edit a schedule on a sheet, you must right-click the schedule and then select
Edit Schedule from the context menu. The Modify Schedule/Quantities tab shown in
Figure 17.19 has many new tools that enable you to modify field selection, hide columns, merge
cells, and perform other functions that are similar to those found in Microsoft Excel.
Figure 17.19
The contextual
tab in the ribbon
for schedules
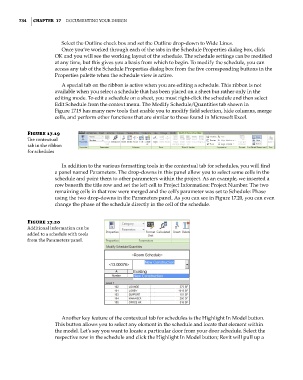
In addition to the various formatting tools in the contextual tab for schedules, you will find
a panel named Parameters. The drop-downs in this panel allow you to select some cells in the
schedule and point them to other parameters within the project. As an example, we inserted a
row beneath the title row and set the left cell to Project Information: Project Number. The two
remaining cells in that row were merged and the cell’s parameter was set to Schedule: Phase
using the two drop-downs in the Parameters panel. As you can see in Figure 17.20, you can even
change the phase of the schedule directly in the cell of the schedule.
Figure 17.20
additional information can be
added to a schedule with tools
from the Parameters panel.
Another key feature of the contextual tab for schedules is the Highlight In Model button.
This button allows you to select any element in the schedule and locate that element within
the model. Let’s say you want to locate a particular door from your door schedule. Select the
respective row in the schedule and click the Highlight In Model button; Revit will pull up a
c17.indd 734 5/3/2014 11:46:28 AM