
Page 231 - Photoshop for Lightroom Users – Scott Kelby 2nd Edition
P. 231
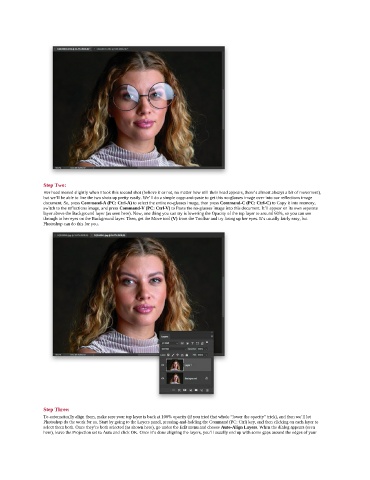
Step Two:
               Her head moved slightly when I took this second shot (believe it or not, no matter how still their head appears, there’s almost always a bit of movement),
               but we’ll be able to line the two shots up pretty easily. We’ll do a simple copy-and-paste to get this no-glasses image over into our reflections image
               document. So, press Command-A (PC: Ctrl-A) to select the entire no-glasses image, then press Command-C (PC: Ctrl-C) to Copy it into memory,
               switch to the reflections image, and press Command-V (PC: Ctrl-V) to Paste the no-glasses image into this document. It’ll appear on its own separate
               layer above the Background layer (as seen here). Now, one thing you can try is lowering the Opacity of the top layer to around 60%, so you can see
               through to her eyes on the Background layer. Then, get the Move tool (V) from the Toolbar and try lining up her eyes. It’s usually fairly easy, but
               Photoshop can do this for you.


               Step Three:
               To automatically align them, make sure your top layer is back at 100% opacity (if you tried that whole “lower the opacity” trick), and then we’ll let
               Photoshop do the work for us. Start by going to the Layers panel, pressing-and-holding the Command (PC: Ctrl) key, and then clicking on each layer to
               select them both. Once they’re both selected (as shown here), go under the Edit menu and choose Auto-Align Layers. When the dialog appears (seen
               here), leave the Projection set to Auto and click OK. Once it’s done aligning the layers, you’ll usually end up with some gaps around the edges of your