
Page 229 - Photoshop for Lightroom Users – Scott Kelby 2nd Edition
P. 229
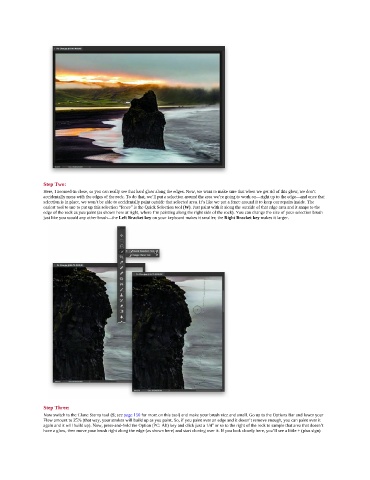
Step Two:
               Here, I zoomed-in close, so you can really see that hard glow along the edges. Now, we want to make sure that when we get rid of this glow, we don’t
               accidentally mess with the edges of the rock. To do that, we’ll put a selection around the area we’re going to work on—right up to the edge—and once that
               selection is in place, we won’t be able to accidentally paint outside that selected area. It’s like we put a fence around it to keep our repairs inside. The
               easiest tool to use to put up this selection “fence” is the Quick Selection tool (W). Just paint with it along the outside of that edge area and it snaps to the
               edge of the rock as you paint (as shown here at right, where I’m painting along the right side of the rock). You can change the size of your selection brush
               just like you would any other brush—the Left Bracket key on your keyboard makes it smaller; the Right Bracket key makes it larger.


               Step Three:
               Now switch to the Clone Stamp tool (S; see page 150 for more on this tool) and make your brush nice and small. Go up to the Options Bar and lower your
               Flow amount to 25% (that way, your strokes will build up as you paint. So, if you paint over an edge and it doesn’t remove enough, you can paint over it
               again and it will build up). Now, press-and-hold the Option (PC: Alt) key and click just a 1/4" or so to the right of the rock to sample that area that doesn’t
               have a glow, then move your brush right along the edge (as shown here) and start cloning over it. If you look closely here, you’ll see a little + (plus sign)