
Page 288 - Kitab3DsMax
P. 288
Part II: Working with Objects
Using the Clone and Align Tool
Imagine you’re working on a production team and the modeler assigned to the project says he needs some
more time to make the building columns “something special.” Just as you prepare to give him the “dead-
lines don’t die” speech, you remember the Clone and Align tool. Using this tool, you can place proxy
objects where the detailed ones are supposed to go. Then, when the detailed object is ready, the Clone and
Align tool lets you clone the detailed object and place it where all the proxies are positioned. This, of
course, makes the modeler happy and doesn’t disrupt your workflow. Another production team victory.
Aligning source objects to destination objects
Before selecting the Tools ➪ Align ➪ Clone and Align tool, you need to select the detailed object that you
want to place. This object is referred to as the source object. Selecting the Clone and Align tool opens a dia-
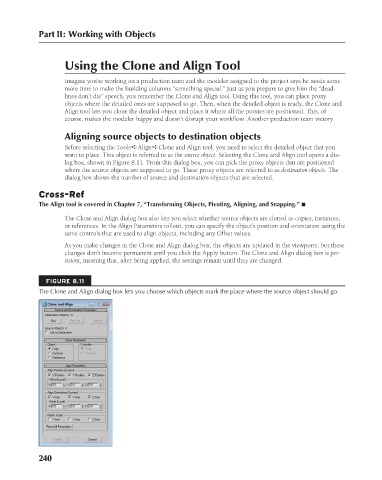
log box, shown in Figure 8.11. From this dialog box, you can pick the proxy objects that are positioned
where the source objects are supposed to go. These proxy objects are referred to as destination objects. The
dialog box shows the number of source and destination objects that are selected.
Cross-Ref
The Align tool is covered in Chapter 7, “Transforming Objects, Pivoting, Aligning, and Snapping.” n
The Clone and Align dialog box also lets you select whether source objects are cloned as copies, instances,
or references. In the Align Parameters rollout, you can specify the object’s position and orientation using the
same controls that are used to align objects, including any Offset values.
As you make changes in the Clone and Align dialog box, the objects are updated in the viewports, but these
changes don’t become permanent until you click the Apply button. The Clone and Align dialog box is per-
sistent, meaning that, after being applied, the settings remain until they are changed.
FIGURE 8.11
The Clone and Align dialog box lets you choose which objects mark the place where the source object should go.
240
6/30/10 4:15 PM
14_617779-ch08.indd 240
14_617779-ch08.indd 240 6/30/10 4:15 PM