
Page 802 - Kitab3DsMax
P. 802
Part VI: Advanced Modeling
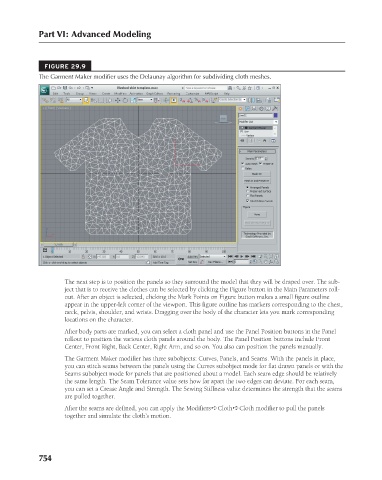
FIGURE 29.9
The Garment Maker modifier uses the Delaunay algorithm for subdividing cloth meshes.
The next step is to position the panels so they surround the model that they will be draped over. The sub-
ject that is to receive the clothes can be selected by clicking the Figure button in the Main Parameters roll-
out. After an object is selected, clicking the Mark Points on Figure button makes a small figure outline
appear in the upper-left corner of the viewport. This figure outline has markers corresponding to the chest,
neck, pelvis, shoulder, and wrists. Dragging over the body of the character lets you mark corresponding
locations on the character.
After body parts are marked, you can select a cloth panel and use the Panel Position buttons in the Panel
rollout to position the various cloth panels around the body. The Panel Position buttons include Front
Center, Front Right, Back Center, Right Arm, and so on. You also can position the panels manually.
The Garment Maker modifier has three subobjects: Curves, Panels, and Seams. With the panels in place,
you can stitch seams between the panels using the Curves subobject mode for flat drawn panels or with the
Seams subobject mode for panels that are positioned about a model. Each seam edge should be relatively
the same length. The Seam Tolerance value sets how far apart the two edges can deviate. For each seam,
you can set a Crease Angle and Strength. The Sewing Stiffness value determines the strength that the seams
are pulled together.
After the seams are defined, you can apply the Modifiers ➪ Cloth ➪ Cloth modifier to pull the panels
together and simulate the cloth’s motion.
754