
Page 813 - Kitab3DsMax
P. 813
Chapter 30: Using Specialized Material Types
3. In the Utility panel, select the Color Clipboard button, and in the Color Clipboard rollout, click
the New Floater button. A palette of colors opens. Drag the Diffuse colors from the Material
Editor for each current material to the Color Clipboard. Max asks if you want to Swap, Copy, or
Cancel the material. Select the Copy option. Leave the Color Clipboard window open.
4. Select the first sample slot, and click on the Material Type button to open the Material/Map
Browser. Double-click the Ink ’n’ Paint material type from the list. Then drag the corresponding
color from the Color Clipboard and copy it in the Lighted color swatch of the Paint Controls roll-
out. Repeat this for each of the five materials.
5. Open and render the Perspective viewport using the Render Scene dialog box.
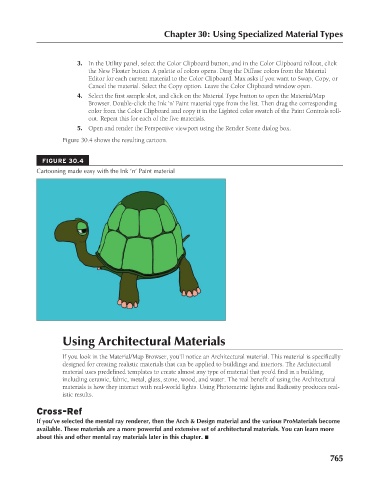
Figure 30.4 shows the resulting cartoon.
FIGURE 30.4
Cartooning made easy with the Ink ’n’ Paint material
Using Architectural Materials
If you look in the Material/Map Browser, you’ll notice an Architectural material. This material is specifically
designed for creating realistic materials that can be applied to buildings and interiors. The Architectural
material uses predefined templates to create almost any type of material that you’d find in a building,
including ceramic, fabric, metal, glass, stone, wood, and water. The real benefit of using the Architectural
materials is how they interact with real-world lights. Using Photometric lights and Radiosity produces real-
istic results.
Cross-Ref
If you’ve selected the mental ray renderer, then the Arch & Design material and the various ProMaterials become
available. These materials are a more powerful and extensive set of architectural materials. You can learn more
about this and other mental ray materials later in this chapter. n
765