
Page 975 - Kitab3DsMax
P. 975
Chapter 37: Understanding Rigging and Working with Bones
can refine individual bones using the Refine button. This button appears at the bottom of the Bone Tools
section of the Bone Editing Tools rollout.
Clicking the Refine button enables you to select bones in the viewport. Every bone that you select is divided
into two bones at the location where you click. Click on the Refine button again to exit Refine mode.
The Mirror button lets you create a mirror copy of the selected bones. This button makes the Bone Mirror
dialog box appear, where you can select the Mirror Axis and the Bone Axis to Flip. You also can specify an
Offset value. In the previous example, you created arms and legs manually, but you could have created one
of them and used the Mirror button to create its opposite.
Coloring bones
Bones, like any other objects, are assigned a default object color, and materials can be applied from the
Material Editor. For each separate bone, its object color can be changed in the Modify panel or in the Bone
Tools panel.
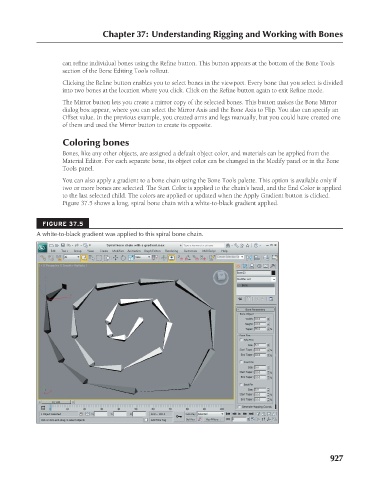
You can also apply a gradient to a bone chain using the Bone Tools palette. This option is available only if
two or more bones are selected. The Start Color is applied to the chain’s head, and the End Color is applied
to the last selected child. The colors are applied or updated when the Apply Gradient button is clicked.
Figure 37.5 shows a long, spiral bone chain with a white-to-black gradient applied.
FIGURE 37.5
A white-to-black gradient was applied to this spiral bone chain.
927