
Page 114 - luminar 2018 - user manual pc v 2_3.pages
P. 114
Painting a Mask
Once you’ve added a mask, you can now add or subtract using a variety of tools. You can freely
switch between the Brush, Radial Mask, and Gradient Mask tools while working. Once you’ve
chosen one of these tools, a new toolbar appears. Let’s explore the essential controls.
Global Mask Controls
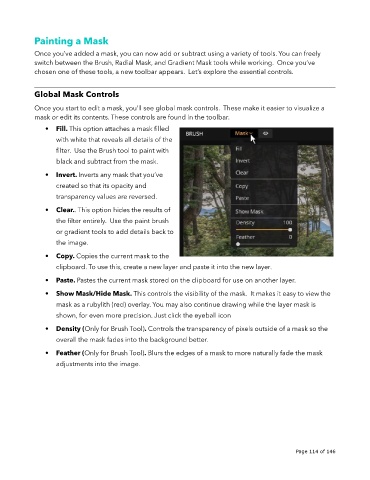
Once you start to edit a mask, you’ll see global mask controls. These make it easier to visualize a
mask or edit its contents. These controls are found in the toolbar.
• Fill. This option attaches a mask filled
with white that reveals all details of the
filter. Use the Brush tool to paint with
black and subtract from the mask.
• Invert. Inverts any mask that you’ve
created so that its opacity and
transparency values are reversed.
• Clear.. This option hides the results of
the filter entirely. Use the paint brush
or gradient tools to add details back to
the image.
• Copy. Copies the current mask to the
clipboard. To use this, create a new layer and paste it into the new layer.
• Paste. Pastes the current mask stored on the clipboard for use on another layer.
• Show Mask/Hide Mask. This controls the visibility of the mask. It makes it easy to view the
mask as a rubylith (red) overlay. You may also continue drawing while the layer mask is
shown, for even more precision. Just click the eyeball icon
• Density (Only for Brush Tool). Controls the transparency of pixels outside of a mask so the
overall the mask fades into the background better.
• Feather (Only for Brush Tool). Blurs the edges of a mask to more naturally fade the mask
adjustments into the image.
!
!
Page 114 of 146