
Page 115 - luminar 2018 - user manual pc v 2_3.pages
P. 115
Mask Tool Controls
The next controls affect how you can add or subtract from your mask. Luminar 2018 offers three
tools that you can use to paint a mask.
• Brush. Use a paintbrush to add or subtract from your mask.
• Radial Mask. Creates an elliptical shape to blend between affected and unaffected areas.
• Gradient Mask. Creates a linear blend between affected and unaffected areas.
Using a Brush Mask
The Brush can be used in either Paint mode or Erase mode to add to or subtract from areas of the
mask. Clicking on the Paint option will add white areas to the mask. These areas will be preserve
the current layer. Brushing with Erase mode is handy for “trimming” overspray of the mask and
making your selection more accurate.
To control a brush, click the Brush Settings dropdown menu (it’s next to the Erase option). In this
window, you can configure all the paint brush settings such as Size, Opacity and Softness. In the
center of the grid there are various presets for quick selection. If you have a pen tablet attached,
you can also configure Pen Pressure, Radius and Opacity levels.
Here’s how to use the Masking Brush tool.
1. Open an image in Luminar 2018.
2. Click the Add Layer button (+ symbol) or choose Layers > Add New Adjustment Layer.
Let’s add an obvious effect so its easy to view.
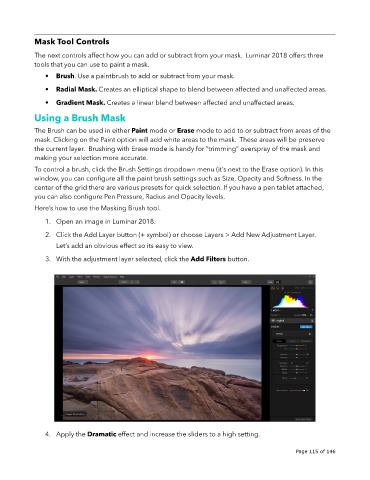
3. With the adjustment layer selected, click the Add Filters button.
4. Apply the Dramatic effect and increase the sliders to a high setting.
!
!
Page 115 of 146