Page 1579 - Workshop Manual - Aumark (BJ1051)
P. 1579

77-37
                                              Internal/external trimming parts-front mask

               Replacement

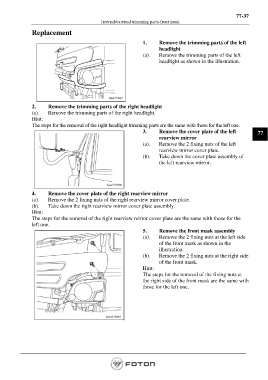
                                                                1.      Remove the trimming parts of the left
                                                                        headlight
                                                                (a).    Remove the trimming parts of the left
                                                                        headlight as shown in the illustration.


               2.     Remove the trimming parts of the right headlight
               (a).    Remove the trimming parts of the right headlight.
               Hint:
               The steps for the removal of the right headlight trimming parts are the same with those for the left one.
                                                                3.      Remove the cover plate of the left          77
                                                                        rearview mirror
                                                                (a).    Remove the 2 fixing nuts of the left
                                                                        rearview mirror cover plate.
                                                                (b).    Take down the cover plate assembly of
                                                                        the left rearview mirror.


               4.     Remove the cover plate of the right rearview mirror
               (a).    Remove the 2 fixing nuts of the right rearview mirror cover plate.
               (b).    Take down the right rearview mirror cover plate assembly.
               Hint:
               The steps for the removal of the right rearview mirror cover plate are the same with those for the
               left one.
                                                                5.      Remove the front mask assembly
                                                                (a).    Remove the 2 fixing nuts at the left side
                                                                        of the front mask as shown in the
                                                                        illustration.
                                                                (b).    Remove the 2 fixing nuts at the right side
                                                                        of the front mask.
                                                                Hint:
                                                                The steps for the removal of the fixing nuts at
                                                                the right side of the front mask are the same with
                                                                those for the left one.


                                                                                                        Page 1579
   1574   1575   1576   1577   1578   1579   1580   1581   1582   1583   1584