
Page 173 - Zoo Animal Learning and Training
P. 173
Chapter 9 Knots and Ropes 157
FIGURE 9.13 Finishing and untying the hanked roped.
Types of Knots and Hitches
In veterinary practice, there are seven frequently used
knots: the halter tie, square knot with its variants such as
the reefer’s knot, sheet bend, bowline, and the bowline
on a bight. The half hitch and clove hitch are also used
to secure patients for various reason in the veterinary
practice.
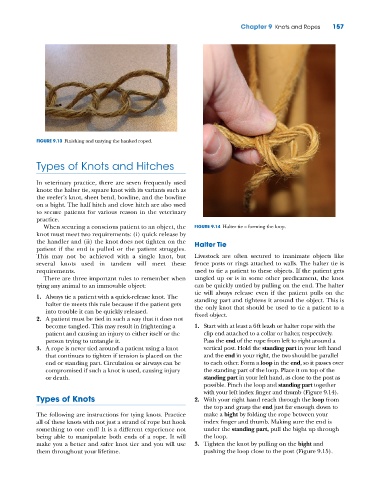
When securing a conscious patient to an object, the FIGURE 9.14 Halter tie – forming the loop.
knot must meet two requirements: (i) quick release by
the handler and (ii) the knot does not tighten on the Halter Tie
patient if the end is pulled or the patient struggles.
This may not be achieved with a single knot, but Livestock are often secured to inanimate objects like
several knots used in tandem will meet these fence posts or rings attached to walls. The halter tie is
requirements. used to tie a patient to these objects. If the patient gets
There are three important rules to remember when tangled up or is in some other predicament, the knot
tying any animal to an immovable object: can be quickly untied by pulling on the end. The halter
tie will always release even if the patient pulls on the
1. Always tie a patient with a quick‐release knot. The standing part and tightens it around the object. This is
halter tie meets this rule because if the patient gets the only knot that should be used to tie a patient to a
into trouble it can be quickly released. fixed object.
2. A patient must be tied in such a way that it does not
become tangled. This may result in frightening a 1. Start with at least a 6 ft leash or halter rope with the
patient and causing an injury to either itself or the clip end attached to a collar or halter, respectively.
person trying to untangle it. Pass the end of the rope from left to right around a
3. A rope is never tied around a patient using a knot vertical post. Hold the standing part in your left hand
that continues to tighten if tension is placed on the and the end in your right, the two should be parallel
end or standing part. Circulation or airways can be to each other. Form a loop in the end, so it passes over
compromised if such a knot is used, causing injury the standing part of the loop. Place it on top of the
or death. standing part in your left hand, as close to the post as
possible. Pinch the loop and standing part together
with your left index finger and thumb (Figure 9.14).
Types of Knots 2. With your right hand reach through the loop from
the top and grasp the end just far enough down to
The following are instructions for tying knots. Practice make a bight by folding the rope between your
all of these knots with not just a strand of rope but hook index finger and thumb. Making sure the end is
something to one end! It is a different experience not under the standing part, pull the bight up through
being able to manipulate both ends of a rope. It will the loop.
make you a better and safer knot tier and you will use 3. Tighten the knot by pulling on the bight and
them throughout your lifetime. pushing the loop close to the post (Figure 9.15).