
Page 87 - Patty Hahne "The Pocket Guide to Prepper Knots"
P. 87
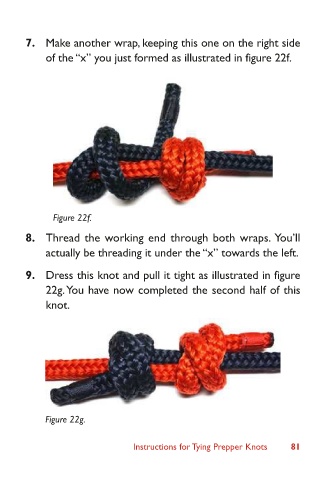
7.  Make another wrap, keeping this one on the right side
                of the “x” you just formed as illustrated in figure 22f.


                 Figure 22f.
            8.  Thread the working end through both wraps.  You’ll
                actually be threading it under the “x” towards the left.

            9.  Dress this knot and pull it tight as illustrated in figure
                22g. You have now completed the second half of this
                knot.


                Figure 22g.


                                Instructions for Tying Prepper Knots         81