
Page 60 - Issue 43
P. 60
With a little time, the rear end is perfectly in line
and both wheels need to be scotched at this
point. One last check with a 4’ level across the
back of the frame, and we’re ready to mount.
Before mounting, one last thing to note is
to put a degree finder on the yoke of the
rear end to make sure its pointing up 6
degrees. This will keep you from knocking
out U joints left and right. When we get
into mounting the motor and transmission,
we will cover this issue more in depth. Note:
Word to the wise... bear in mind the size of
the tires that are on the rear end, lest they’re
different sizes. Also make sure they’re the
same height as the tires that will be on the
finished rod.
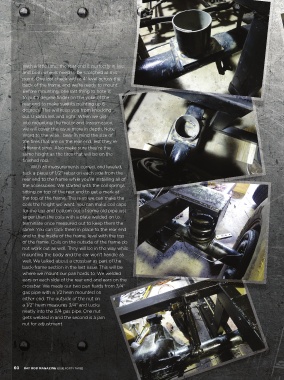
With all measurements correct and leveled,
tack a piece of 1/2” rebar on each side from the
rear end to the frame while you’re installing all of
the accessories. We started with the coil springs
sitting on top of the rear end to get a mark at
the top of the frame. This is so we can make the
coils the height we want. You can make coil caps
for the top and bottom out of some old pipe just
larger than the coils with a plate welded on to
terminate once measured out to keep them the
same. You can tack them in place to the rear end
and to the inside of the frame, level with the top
of the frame. Coils on the outside of the frame do
not work out as well. They will be in the way while
mounting the body and the car won’t handle as
well. We talked about a crossbar as part of the
back-frame section in the last issue. This will be
where we mount our pan hards to. We welded
ears on each side of the rear end and ears on the
crossbar. We made our two pan hards from 3/4”
gas pipe with a 1/2 heim mounted on
either end. The outside of the nut on
a 1/2” heim measures 3/4” and tucks
neatly into the 3/4 gas pipe. One nut
gets welded in and the second is a jam
nut for adjustment.
60 RAT ROD MAGAZINE ISSUE FORTY-THREE
58x61 TommysToolbox.indd 60 4/4/17 1:14 PM