
Page 63 - Issue 43
P. 63
Step 2: Order/Buy your desired gauges
Tip: Sometimes eBay or swap meets can provide
some cool vintage gauges if you’re trying to go
vintage with instrumentation. Otherwise I almost
always personally use AutoMeter gauges.
For this example we have chosen AutoMeter
instrumentation as outlined below:
» (Four) 2.065” “Ultra-Lite” Gauges (Water, oil,
pyrometer, boost)
» (One) 3.375” “Ultra-Lite” Electronic signal
Speedometer
» (One) 2.625” Diesel specifi c tachometer
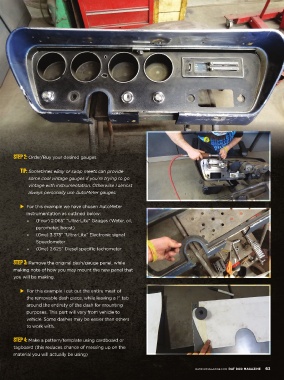
Step 3: Remove the original dash/gauge panel, while
making note of how you may mount the new panel that
you will be making.
For this example I cut out the entire meat of
the removable dash piece, while leaving a 1” tab
around the entirety of the dash for mounting
purposes. This part will vary from vehicle to
vehicle. Some dashes may be easier than others
to work with.
Step 4: Make a pattern/template using cardboard or
tagboard (this reduces chance of messing up on the
material you will actually be using)
RATRODMAGAZINE.COM RAT ROD MAGAZINE 63
62x67 tinman.indd 63 4/4/17 1:07 PM