
Page 66 - Issue 43
P. 66
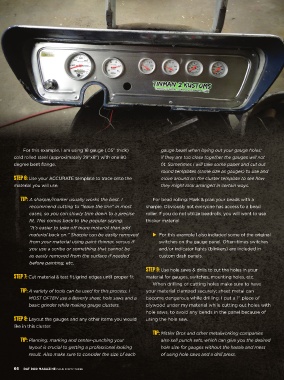
For this example, I am using 18 gauge (.05” thick) gauge bezel when laying out your gauge holes;
cold rolled steel (approximately 29”x8”) with one 80 if they are too close together the gauges will not
degree bent fl ange. fi t. Sometimes I will take some paper and cut out
round templates (same size as gauges) to use and
Step 6: Use your ACCURATE template to trace onto the move around on the cluster template to see how
material you will use. they might look arranged in certain ways.
Tip: A sharpie/marker usually works the best. I For bead rolling: Mark & plan your beads with a
recommend cutting to “leave the line” in most sharpie. Obviously not everyone has access to a bead
cases, so you can slowly trim down to a precise roller. If you do not utilize beadrolls, you will want to use
fi t. This comes back to the popular saying: thicker material
“It’s easier to take off more material than add
material back on.” Sharpie can be easily removed For this example I also included some of the original
from your material using paint thinner, versus if switches on the gauge panel. Often-times switches
you use a scribe or something that cannot be and/or indicator lights (blinkers) are included in
as easily removed from the surface if needed custom dash panels.
before painting, etc.
Step 9: Use hole saws & drills to cut the holes in your
Step 7: Cut material & test fi t/grind edges until proper fi t material for gauges, switches, mounting holes, etc.
When drilling or cutting holes make sure to have
Tip: A variety of tools can be used for this process. I your material clamped securely; sheet metal can
MOST OFTEN use a Beverly sheer, hole saws and a become dangerous while drilling. I put a 1” piece of
basic grinder while making gauge clusters. plywood under my material while cutting out holes with
hole saws, to avoid any bends in the panel because of
Step 8: Layout the gauges and any other items you would using the hole saw.
like in this cluster.
Tip: Mittler Bros and other metalworking companies
Tip: Planning, marking and center-punching your also sell punch sets, which can give you the desired
layout is crucial to getting a professional looking hole size for gauges without the hassle and mess
result. Also make sure to consider the size of each of using hole saws and a drill press.
66 RAT ROD MAGAZINE ISSUE FORTY-THREE
62x67 tinman.indd 66 4/4/17 1:08 PM