Page 1334 - Chief Architect Reference Manual
P. 1334
Watermarks


                                                                       •  Specify the Print Size of the watermark
                                                                          text, as measured from the baseline to top
                                                                          of the capital letter A in the selected Font.
                                                                       •  Select a Font from the drop-down list.
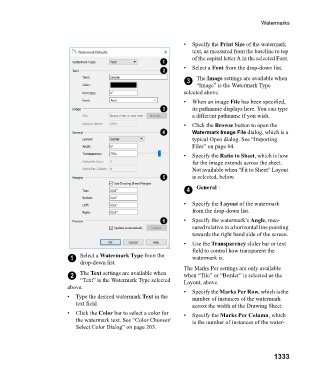
                                                                        3  The Image settings are available when
                                                                           “Image” is the Watermark Type
                                                                       selected above.
                                                                       •  When an image File has been specified,
                                                                          its pathname displays here. You can type
                                                                          a different pathname if you wish.
                                                                       •  Click the Browse button to open the
                                                                          Watermark Image File dialog, which is a
                                                                          typical Open dialog. See “Importing
                                                                          Files” on page 64.
                                                                       •  Specify the Ratio to Sheet, which is how
                                                                          far the image extends across the sheet.
                                                                          Not available when “Fit to Sheet” Layout
                                                                          is selected, below.

                                                                        4  General -

                                                                       •  Specify the Layout of the watermark
                                                                          from the drop-down list.
                                                                       •  Specify the watermark’s Angle, mea-
                                                                          sured relative to a horizontal line pointing
                                                                          towards the right hand side of the screen.
                                                                       •  Use the Transparency slider bar or text
                                                                          field to control how transparent the
                                1   Select a Watermark Type from the      watermark is.
                                    drop-down list.
                                                                       The Marks Per settings are only available
                                2   The Text settings are available when   when “Tile” or “Border” is selected as the
                                    “Text” is the Watermark Type selected   Layout, above.
                               above.
                                                                       •  Specify the Marks Per Row, which is the
                               •  Type the desired watermark Text in the   number of instances of the watermark
                                  text field.                             across the width of the Drawing Sheet.
                               •  Click the Color bar to select a color for   •  Specify the Marks Per Column, which
                                  the watermark text. See “Color Chooser/  is the number of instances of the water-
                                  Select Color Dialog” on page 203.


                                                                                                      1333

