
Page 28 - Airblade® Dryer - Mix and Match
P. 28
AIRBLADE® DRYER Mix and Match
Installation
2-Nozzle Frame Assembly: Wall Mounted
Note: Drip space is the distance between the last Rinse Arch and the Dryer. Typically, the larger the
drip space, the better the Dryer can perform.
Note: Actual tunnel depth will vary according to available building space.
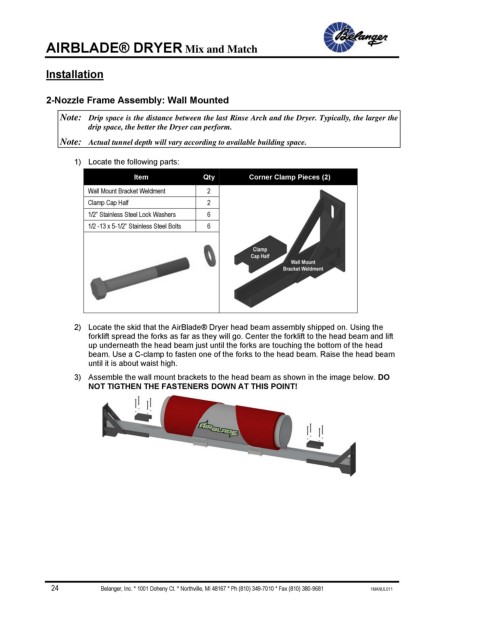
1) Locate the following parts:
Item Qty Corner Clamp Pieces (2)
Wall Mount Bracket Weldment 2
Clamp Cap Half 2
1/2” Stainless Steel Lock Washers 6
1/2 -13 x 5-1/2” Stainless Steel Bolts 6
2) Locate the skid that the AirBlade® Dryer head beam assembly shipped on. Using the
forklift spread the forks as far as they will go. Center the forklift to the head beam and lift
up underneath the head beam just until the forks are touching the bottom of the head
beam. Use a C-clamp to fasten one of the forks to the head beam. Raise the head beam
until it is about waist high.
3) Assemble the wall mount brackets to the head beam as shown in the image below. DO
NOT TIGTHEN THE FASTENERS DOWN AT THIS POINT!
24 Belanger, Inc. * 1001 Doheny Ct. * Northville, MI 48167 * Ph (810) 349-7010 * Fax (810) 380-9681 1MANUL011