
Page 11 - Premium Tunnel Sign
P. 11
PREMIUM TUNNEL SIGN
Installation
Assembly: Floor Mounted Version
1) Remove the assembled sign and accessory box from the shipping package.
2) Position sign in its approximate tunnel location.
3) The sign should be positioned prior to the service being offered. Be sure to place it far enough
from equipment so that moving parts or direct high pressure spray will not come in direct contact
with the sign.
4) Locate provided lag bolts from accessory box. Using a 1/2” (13 mm) hammer drill bit, lag sign
stand to floor.
5) Remove the six screws holding the stainless steel sign face retainers in place.
Note: Remove the side retainers first, then the top, and finally the bottom end retainers.
6) Remove the face. Keep track of which side each piece was removed from to ensure holes will
align properly when replacing.
7) Locate a spot on the bottom of the sign cabinet and drill a hole for the electrical fitting being used.
CAUTION
When All electrical feed holes must be drilled from the bottom to reduce the chance of moisture
coming in contact with electrical circuits
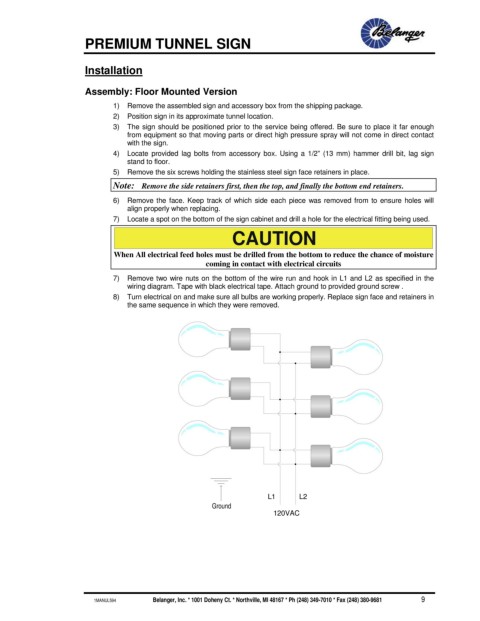
7) Remove two wire nuts on the bottom of the wire run and hook in L1 and L2 as specified in the
wiring diagram. Tape with black electrical tape. Attach ground to provided ground screw .
8) Turn electrical on and make sure all bulbs are working properly. Replace sign face and retainers in
the same sequence in which they were removed.
L1 L2
Ground
120VAC
1MANUL594 Belanger, Inc. * 1001 Doheny Ct. * Northville, MI 48167 * Ph (248) 349-7010 * Fax (248) 380-9681 9