
Page 12 - Premium Tunnel Sign
P. 12
PREMIUM TUNNEL SIGN
Installation
Assembly: Wall Mounted
Note: When mounting to the wall, some sort of wall mounting brackets will be required (not
supplied).
1) Remove the assembled sign and accessory box from the shipping package.
2) Remove the 6 screws holding the stainless steel retainers in place. Remove the side retainers
first, then the top, and finally the bottom end retainers. Remove the face. Keep track of which side
each piece was removed from to ensure holes will align properly when replacing.
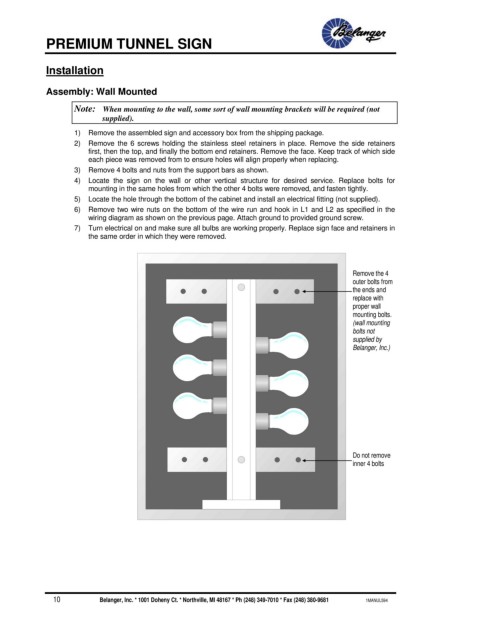
3) Remove 4 bolts and nuts from the support bars as shown.
4) Locate the sign on the wall or other vertical structure for desired service. Replace bolts for
mounting in the same holes from which the other 4 bolts were removed, and fasten tightly.
5) Locate the hole through the bottom of the cabinet and install an electrical fitting (not supplied).
6) Remove two wire nuts on the bottom of the wire run and hook in L1 and L2 as specified in the
wiring diagram as shown on the previous page. Attach ground to provided ground screw.
7) Turn electrical on and make sure all bulbs are working properly. Replace sign face and retainers in
the same order in which they were removed.
Remove the 4
outer bolts from
the ends and
replace with
proper wall
mounting bolts.
(wall mounting
bolts not
supplied by
Belanger, Inc.)
Do not remove
inner 4 bolts
10 Belanger, Inc. * 1001 Doheny Ct. * Northville, MI 48167 * Ph (248) 349-7010 * Fax (248) 380-9681 1MANUL594