
Page 48 - Top Wheel Signature® Series
P. 48
SignatureSignature SeriesSeries
TOP WHEEL SignatureSignature ® SeriesSeries
Maintenance
Torque Plate and Electric Motor Replacement
Replacing Torque Plate Fasteners
1) Using the Loctite cleaner, clean the bottom of the gearbox along with the threaded holes.
Allow time to air dry, in a warm environment. Make sure the gearbox mounting holes are
clean and dry at this point. If not, repeat the process.
Once the mounting holes are cleaned and dry the gearbox can be reassembled.
2) Place the torque plate and the torque ring back onto the gearbox at the same position as
when it was removed.
Note: Confirm the position of the torque plate to verify correct orientation on the gearbox.
3) Locate the supplied M8 flat head fasteners (1FSTNR-FH075). Carefully apply some of the
supplied 271 Red Loctite on each fastener as they are installed. Loctite should be applied
lengthwise to the bottom half of the fasteners with a bead as wide as the 3/16” nozzle tip.
4) Turn the fastener a 1/4 turn and reapply the Loctite in the same fashion.
5) Insert the flat head fasteners into the threaded mounting holes and tighten until the fasteners
touch the chamfered hole within the torque plate.
6) Repeat steps 3 and 5 on the remaining fasteners.
Before tightening fasteners to the proper torque, this is once again an opportunity to verify
that the torque plate orientation is correct on the gearbox.
7) Using a torque wrench along with a 5 mm hex key socket, torque all four fasteners to 25 ft-
lbs.
8) Allow this assembly to cure at least 24 hours in a warm (70 degree) environment, as the
Loctite takes at least this time to cure properly. Doing so will ensure the fasteners will set
appropriately.
Reinstall Motor Gearbox assembly
If the assembly does not have a cover, proceed to step 2
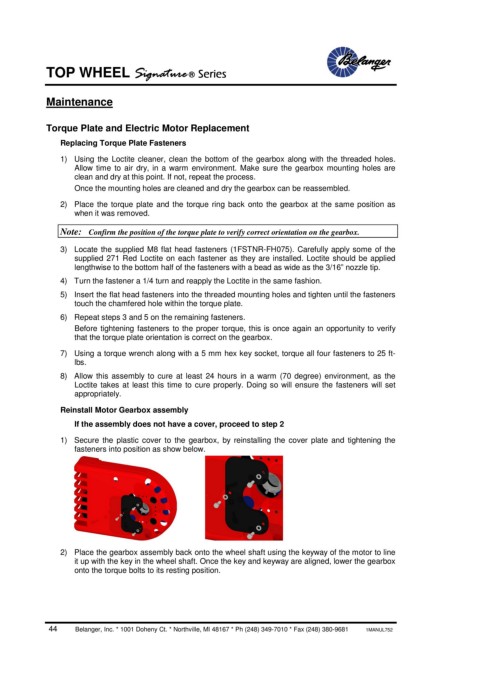
1) Secure the plastic cover to the gearbox, by reinstalling the cover plate and tightening the
fasteners into position as show below.
2) Place the gearbox assembly back onto the wheel shaft using the keyway of the motor to line
it up with the key in the wheel shaft. Once the key and keyway are aligned, lower the gearbox
onto the torque bolts to its resting position.
44 Belanger, Inc. * 1001 Doheny Ct. * Northville, MI 48167 * Ph (248) 349-7010 * Fax (248) 380-9681 1MANUL752