Page 52 - 3D World - October 2017
P. 52
TuTorials
          Simulate a Ghost Rider transformation


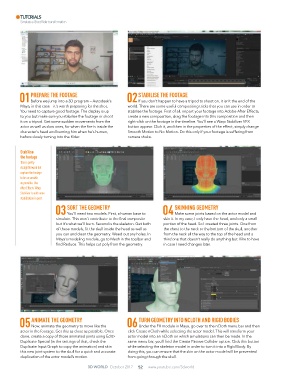
               PRePARe the footAge                             StAbiliSe the footAge
          01Before we jump into a 3D program – Autodesk’s   02 If you don’t happen to have a tripod to shoot on, it isn’t the end of the
          Maya, in this case – it’s worth preparing for the shot.   world. There are some useful compositing tricks that you can use in order to
          You need to capture good footage. The display is up   stabilise the footage. First of all, import your footage into Adobe After Effects,
          to you but make sure you stabilise the footage or shoot   create a new composition, drag the footage into this composition and then
          it on a tripod. Get some sudden movements from the   right-click on the footage in the timeline. You’ll see a Warp Stabilizer VFX
          actor as well as slow ones, for when the fire is inside the   button appear. Click it, and then in the properties of the effect, simply change
          character’s head and burning him when he’s human,   Smooth Motion to No Motion. Do this only if your footage is suffering from
          before slowly turning into the Rider.           camera shake.


          Stabilise
          the footage
          This is pretty
          straightforward but
          capture the footage
          to be as smooth
          as possible. Use
          After Effects’ Warp
          Stabilizer to add some
          stabilisation in post.
                               SoRt the geometRy                               Skinning geometRy
                          03 You’ll need two models. First, a human base to   04 Make some joints based on the actor model and
                          simulate. This won’t contribute to the final composite   skin it. In my case, I only have the head, and only a small
                          but it’s what we’ll burn. Second is the skeleton. Get both   portion of the head. So I created three joints. One from
                          of these models, fit the skull inside the head as well as   the chest to the neck or the bottom of the skull, another
                          you can and clean the geometry. Weed out any holes. In   from the neck all the way to the top of the head and a
                          Maya’s modeling module, go to Mesh in the toolbar and   third one that doesn’t really do anything but I like to have
                          find Reduce. This helps cut poly from the geometry.  in case I need changes later.


               AnimAte the geometRy                            tuRn geometRy into ncloth AnD RigiD boDieS
          05 Now, animate the geometry to move like the   06 Under the FX module in Maya, go over to the nCloth menu bar and then
          actor in the footage. Get this as close as possible. Once   click Create nCloth while selecting the actor model. This will transform your
          done, create a copy of those animated joints using Edit>   actor model into an nCloth on which simulations can then be made. In the
          Duplicate Special (in the settings of that, check the   same menu bar, you’ll find the Create Passive Collider option. Click this button
          Duplicate Input Graph to copy the animation) and skin   while selecting the skeleton model in order to turn it into a Rigid Body. By
          this new joint system to the skull for a quick and accurate   doing this, you can ensure that the skin on the actor model will be prevented
          duplication of the actor model’s motion.        from going through the skull.

                                        3D WorlD  October 2017  52   www.youtube.com/3dworld

