
Page 485 - Divyank Tyagi
P. 485
|
unDeRstanDing PHoto-RealistiC Visualization 451
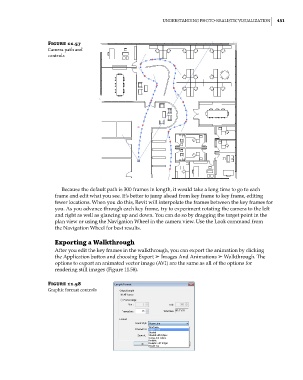
Figure 11.57
Camera path and
controls
Because the default path is 300 frames in length, it would take a long time to go to each
frame and edit what you see. It’s better to jump ahead from key frame to key frame, editing
fewer locations. When you do this, Revit will interpolate the frames between the key frames for
you. As you advance through each key frame, try to experiment rotating the camera to the left
and right as well as glancing up and down. You can do so by dragging the target point in the
plan view or using the Navigation Wheel in the camera view. Use the Look command from
the Navigation Wheel for best results.
Exporting a Walkthrough
After you edit the key frames in the walkthrough, you can export the animation by clicking
the Application button and choosing Export ➢ Images And Animations ➢ Walkthrough. The
options to export an animated vector image (AVI) are the same as all of the options for
rendering still images (Figure 11.58).
Figure 11.58
graphic format controls
c11.indd 451 5/3/2014 11:07:19 AM