
Page 68 - Divyank Tyagi
P. 68
34 | ChAPter 2 Applying the principles of the User interfAce And project orgAnizAtion
To pan in any view, press and hold the wheel button on your mouse while moving it
around your mouse pad. Hold the Shift key and use the wheel button on the mouse to
orbit a 3D view.
The mouse wheel can be used to zoom in and zoom out of any view, but the zooming
may be somewhat choppy. Hold the Ctrl key and press the wheel button while moving
the mouse forward to zoom out (pushing the model away) or backward to zoom in (pull-
ing the model toward you). In camera views, zooming works a bit differently. Scrolling
the mouse wheel zooms in and out but includes the view’s crop region. To adjust the view
within the crop region, only the SteeringWheels and the ViewCube can be used.
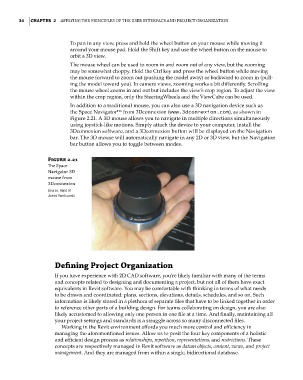
In addition to a traditional mouse, you can also use a 3D navigation device such as
the Space Navigator™ from 3Dconnexion (www.3dconnexion.com), as shown in
Figure 2.21. A 3D mouse allows you to navigate in multiple directions simultaneously
using joystick-like motions. Simply attach the device to your computer, install the
3Dconnexion software, and a 3Dconnexion button will be displayed on the Navigation
bar. The 3D mouse will automatically navigate in any 2D or 3D view, but the Navigation
bar button allows you to toggle between modes.
Figure 2.21
The space
navigator 3d
mouse from
3dconnexion
Source: Hand of
James Vandezande
Defining Project Organization
If you have experience with 2D CAD software, you’re likely familiar with many of the terms
and concepts related to designing and documenting a project, but not all of them have exact
equivalents in Revit software. You may be comfortable with thinking in terms of what needs
to be drawn and coordinated: plans, sections, elevations, details, schedules, and so on. Such
information is likely stored in a plethora of separate files that have to be linked together in order
to reference other parts of a building design. For teams collaborating on design, you are also
likely accustomed to allowing only one person in one file at a time. And finally, maintaining all
your project settings and standards is a struggle across so many disconnected files.
Working in the Revit environment affords you much more control and efficiency in
managing the aforementioned issues. Allow us to posit the four key components of a holistic
and efficient design process as relationships, repetition, representations, and restrictions. These
concepts are respectively managed in Revit software as datum objects, content, views, and project
management. And they are managed from within a single, bidirectional database.
c02.indd 34 5/3/2014 10:31:56 AM