
Page 747 - Divyank Tyagi
P. 747
|
reusing Details FroM otHer Files 713
We have created a sample file using this method for use in the remainder of this
exercise. Make sure you download the file c16_JambDetail.rvt from the book’s com-
panion website.
5. Continue with the sample building project file saved from the previous exercises in this
chapter.
6. From the View tab, click Drafting View to create a new view, and name it JAMB DTL.
The scale does not matter because it will inherit the scale of the imported detail.
7. From the Insert tab of the ribbon, choose Insert From File and then Insert 2D Elements
From File.
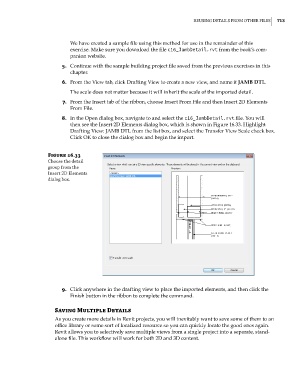
8. In the Open dialog box, navigate to and select the c16_JambDetail.rvt file. You will
then see the Insert 2D Elements dialog box, which is shown in Figure 16.33. Highlight
Drafting View: JAMB DTL from the list box, and select the Transfer View Scale check box.
Click OK to close the dialog box and begin the import.
Figure 16.33
Choose the detail
group from the
insert 2D elements
dialog box.
9. Click anywhere in the drafting view to place the imported elements, and then click the
Finish button in the ribbon to complete the command.
Saving Multiple Details
As you create more details in Revit projects, you will inevitably want to save some of them to an
office library or some sort of localized resource so you can quickly locate the good ones again.
Revit allows you to selectively save multiple views from a single project into a separate, stand-
alone file. This workflow will work for both 2D and 3D content.
c16.indd 713 5/3/2014 11:34:34 AM