
Page 841 - Divyank Tyagi
P. 841
|
using Digital MarkuPs 807
Markups can be linked only to sheets. If you export a view and mark it up, you will not be
able to link that view back into the model. Also, none of the other linework from the DWF will
link into the model—any of the building geometry, backgrounds, sheet content, and so on. The
only thing that will be visible in Revit is content created with the DWF Markup tool.
You cannot move or delete linked DWF markups—they appear with a pin if selected;
however, you can do a number of things to graphically indicate that you’ve reviewed a markup:
Change its graphic appearance. Let’s say you have 20 redline markups on your sheet.
You need to keep track of which ones you’ve picked up. One way to do this is to graphically
override each markup as you make the requested modifications. Select the markup, right-click,
choose View ➢ By Element, and click Override Graphics. Choose a color to indicate “done.”
Yellow works well because it suggests a highlight marker.
Hide it. This approach is similar to the graphic override, but you hide the markup altogether.
Select the markup, right-click, and choose Hide In View ➢ Element.
Remove it. You can remove markups by choosing Manage Links from the Manage tab. In
the Manage Links dialog box, select the DWF Markups tab, select the markup, and click the
Remove button. This removes all markups associated with the link.
Another way you can interact with a linked DWF file is by modifying the status or
appending comments to each markup. You can access these features in the Properties palette
when you select a markup, as follows:
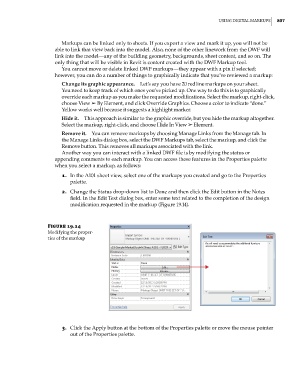
1. In the A101 sheet view, select one of the markups you created and go to the Properties
palette.
2. Change the Status drop-down list to Done and then click the Edit button in the Notes
field. In the Edit Text dialog box, enter some text related to the completion of the design
modification requested in the markup (Figure 19.14).
Figure 19.14
Modifying the proper-
ties of the markup
3. Click the Apply button at the bottom of the Properties palette or move the mouse pointer
out of the Properties palette.
c19.indd 807 05-05-2014 16:22:43