
Page 18 - Photoshop for Lightroom Users – Scott Kelby 2nd Edition
P. 18
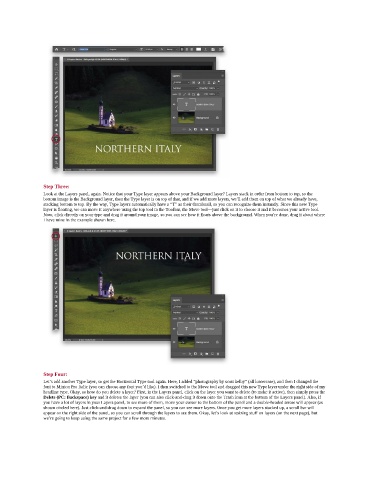
Step Three:
               Look at the Layers panel, again. Notice that your Type layer appears above your Background layer? Layers stack in order from bottom to top, so the
               bottom image is the Background layer, then the Type layer is on top of that, and if we add more layers, we’ll add them on top of what we already have,
               stacking bottom to top. By the way, Type layers automatically have a “T” as their thumbnail, so you can recognize them instantly. Since this new Type
               layer is floating, we can move it anywhere using the top tool in the Toolbar, the Move tool—just click on it to choose it and it becomes your active tool.
               Now, click directly on your type and drag it around your image, so you can see how it floats above the background. When you’re done, drag it about where
               I have mine in the example shown here.


               Step Four:
               Let’s add another Type layer, so get the Horizontal Type tool again. Here, I added “photography by scott kelby” (all lowercase), and then I changed the
               font to Minion Pro Italic (you can choose any font you’d like). I then switched to the Move tool and dragged this new Type layer under the right side of my
               headline type. Okay, so how do you delete a layer? First, in the Layers panel, click on the layer you want to delete (to make it active), then simply press the
               Delete (PC: Backspace) key and it deletes the layer (you can also click-and-drag it down onto the Trash icon at the bottom of the Layers panel). Also, if
               you have a lot of layers in your Layers panel, to see more of them, move your cursor to the bottom of the panel and a double-headed arrow will appear (as
               shown circled here). Just click-and-drag down to expand the panel, so you can see more layers. Once you get more layers stacked up, a scroll bar will
               appear on the right side of the panel, so you can scroll through the layers to see them. Okay, let’s look at resizing stuff on layers (on the next page), but
               we’re going to keep using the same project for a few more minutes.