
Page 19 - Photoshop for Lightroom Users – Scott Kelby 2nd Edition
P. 19
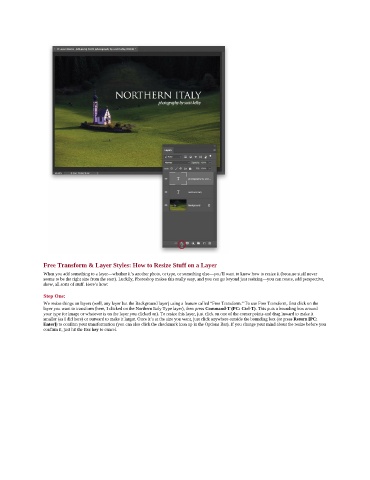
Free Transform & Layer Styles: How to Resize Stuff on a Layer
               When you add something to a layer—whether it’s another photo, or type, or something else—you’ll want to know how to resize it (because stuff never
               seems to be the right size from the start). Luckily, Photoshop makes this really easy, and you can go beyond just resizing—you can rotate, add perspective,
               skew, all sorts of stuff. Here’s how:

               Step One:
               We resize things on layers (well, any layer but the Background layer) using a feature called “Free Transform.” To use Free Transform, first click on the
               layer you want to transform (here, I clicked on the Northern Italy Type layer), then press Command-T (PC: Ctrl-T). This puts a bounding box around
               your type (or image or whatever is on the layer you clicked on). To resize this layer, just click on one of the corner points and drag inward to make it
               smaller (as I did here) or outward to make it larger. Once it’s at the size you want, just click anywhere outside the bounding box (or press Return [PC:
               Enter]) to confirm your transformation (you can also click the checkmark icon up in the Options Bar). If you change your mind about the resize before you
               confirm it, just hit the Esc key to cancel.