
Page 212 - Photoshop for Lightroom Users – Scott Kelby 2nd Edition
P. 212
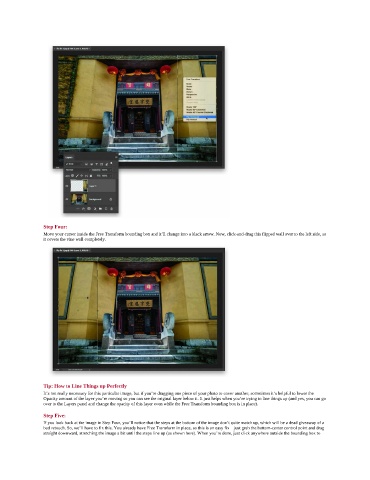
Step Four:
               Move your cursor inside the Free Transform bounding box and it’ll change into a black arrow. Now, click-and-drag this flipped wall over to the left side, so
               it covers the vine wall completely.


               Tip: How to Line Things up Perfectly
               It’s not really necessary for this particular image, but if you’re dragging one piece of your photo to cover another, sometimes it’s helpful to lower the
               Opacity amount of the layer you’re moving so you can see the original layer below it. It just helps when you’re trying to line things up (and yes, you can go
               over to the Layers panel and change the opacity of this layer even while the Free Transform bounding box is in place).
               Step Five:
               If you look back at the image in Step Four, you’ll notice that the steps at the bottom of the image don’t quite match up, which will be a dead giveaway of a
               bad retouch. So, we’ll have to fix this. You already have Free Transform in place, so this is an easy fix—just grab the bottom-center control point and drag
               straight downward, stretching the image a bit until the steps line up (as shown here). When you’re done, just click anywhere outside the bounding box to