
Page 41 - Photoshop for Lightroom Users – Scott Kelby 2nd Edition
P. 41
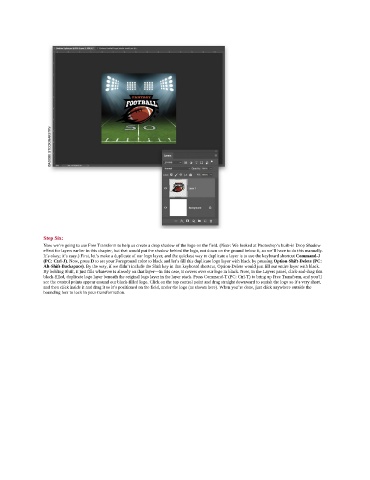
Step Six:
               Now we’re going to use Free Transform to help us create a drop shadow of the logo on the field. (Note: We looked at Photoshop’s built-in Drop Shadow
               effect for layers earlier in this chapter, but that would put the shadow behind the logo, not down on the ground below it, so we’ll have to do this manually.
               It’s okay; it’s easy.) First, let’s make a duplicate of our logo layer, and the quickest way to duplicate a layer is to use the keyboard shortcut Command-J
               (PC: Ctrl-J). Now, press D to set your Foreground color to black and let’s fill this duplicate logo layer with black by pressing Option-Shift-Delete (PC:
               Alt-Shift-Backspace). By the way, if we didn’t include the Shift key in that keyboard shortcut, Option-Delete would just fill our entire layer with black.
               By holding Shift, it just fills whatever is already on that layer—in this case, it covers over our logo in black. Now, in the Layers panel, click-and-drag this
               black-filled, duplicate logo layer beneath the original logo layer in the layer stack. Press Command-T (PC: Ctrl-T) to bring up Free Transform, and you’ll
               see the control points appear around our black-filled logo. Click on the top control point and drag straight downward to squish the logo so it’s very short,
               and then click inside it and drag it so it’s positioned on the field, under the logo (as shown here). When you’re done, just click anywhere outside the
               bounding box to lock in your transformation.