
Page 45 - Photoshop for Lightroom Users – Scott Kelby 2nd Edition
P. 45
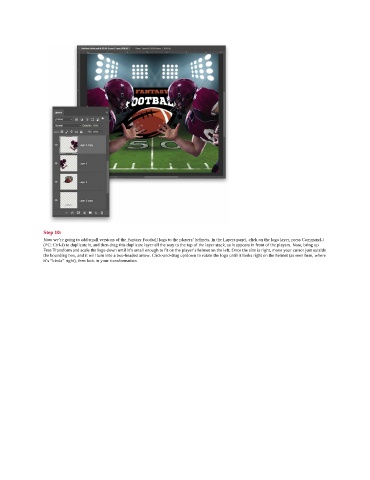
Step 10:
               Now we’re going to add small versions of the Fantasy Football logo to the players’ helmets. In the Layers panel, click on the logo layer, press Command-J
               (PC: Ctrl-J) to duplicate it, and then drag this duplicate layer all the way to the top of the layer stack, so it appears in front of the players. Now, bring up
               Free Transform and scale the logo down until it’s small enough to fit on the player’s helmet on the left. Once the size is right, move your cursor just outside
               the bounding box, and it will turn into a two-headed arrow. Click-and-drag up/down to rotate the logo until it looks right on the helmet (as seen here, where
               it’s “kinda” right), then lock in your transformation.