
Page 49 - Photoshop for Lightroom Users – Scott Kelby 2nd Edition
P. 49
Adjusting that Selected Area:
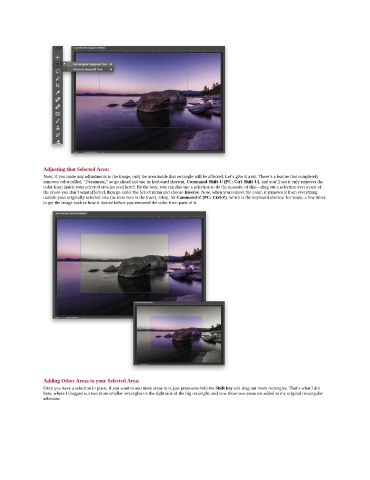
Now, if you make any adjustments to the image, only the area inside that rectangle will be affected. Let’s give it a try. There’s a feature that completely
removes color called, “Desaturate,” so go ahead and use its keyboard shortcut, Command-Shift-U (PC: Ctrl-Shift-U), and you’ll see it only removes the
color from inside your selected area (as seen here). By the way, you can also use a selection to do the opposite of this—drag out a selection over a part of
the photo you don’t want affected, then go under the Select menu and choose Inverse. Now, when you remove the color, it removes it from everything
outside your originally selected area (as seen here in the inset). Okay, hit Command-Z (PC: Ctrl-Z), which is the keyboard shortcut for Undo, a few times
to get the image back to how it looked before you removed the color from parts of it.
Adding Other Areas to your Selected Area:
Once you have a selection in place, if you want to add more areas to it, just press-and-hold the Shift key and drag out more rectangles. That’s what I did
here, where I dragged out two more smaller rectangles on the right side of the big rectangle, and now those two areas are added to my original rectangular
selection.