
Page 71 - Photoshop for Lightroom Users – Scott Kelby 2nd Edition
P. 71
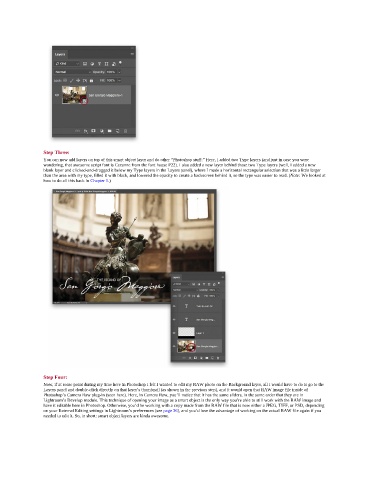
Step Three:
               You can now add layers on top of this smart object layer and do other “Photoshop stuff.” Here, I added two Type layers (and just in case you were
               wondering, that awesome script font is Cezanne from the font house P22). I also added a new layer behind those two Type layers (well, I added a new
               blank layer and clicked-and-dragged it below my Type layers in the Layers panel), where I made a horizontal rectangular selection that was a little larger
               than the area with my type, filled it with black, and lowered the opacity to create a backscreen behind it, so the type was easier to read. (Note: We looked at
               how to do all this back in Chapter 1.)


               Step Four:
               Now, if at some point during my time here in Photoshop I felt I wanted to edit my RAW photo on the Background layer, all I would have to do is go to the
               Layers panel and double-click directly on that layer’s thumbnail (as shown in the previous step), and it would open that RAW image file inside of
               Photoshop’s Camera Raw plug-in (seen here). Here, in Camera Raw, you’ll notice that it has the same sliders, in the same order that they are in
               Lightroom’s Develop module. This technique of opening your image as a smart object is the only way you’re able to still work with the RAW image and
               have it editable here in Photoshop. Otherwise, you’d be working with a copy made from the RAW file that is now either a JPEG, TIFF, or PSD, depending
               on your External Editing settings in Lightroom’s preferences (see page 36), and you’d lose the advantage of working on the actual RAW file again if you
               needed to edit it. So, in short: smart object layers are kinda awesome.