
Page 76 - Photoshop for Lightroom Users – Scott Kelby 2nd Edition
P. 76
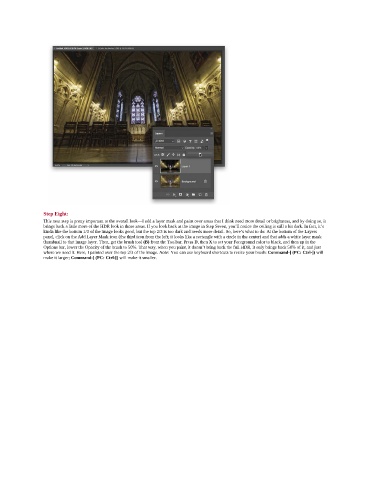
Step Eight:
               This next step is pretty important to the overall look—I add a layer mask and paint over areas that I think need more detail or brightness, and by doing so, it
               brings back a little more of the HDR look in those areas. If you look back at the image in Step Seven, you’ll notice the ceiling is still a bit dark. In fact, it’s
               kinda like the bottom 1/3 of the image looks good, but the top 2/3 is too dark and needs more detail. So, here’s what to do: At the bottom of the Layers
               panel, click on the Add Layer Mask icon (the third icon from the left; it looks like a rectangle with a circle in the center) and that adds a white layer mask
               thumbnail to that image layer. Then, get the brush tool (B) from the Toolbar. Press D, then X to set your Foreground color to black, and then up in the
               Options bar, lower the Opacity of the brush to 50%. That way, when you paint, it doesn’t bring back the full HDR, it only brings back 50% of it, and just
               where we need it. Here, I painted over the top 2/3 of the image. Note: You can use keyboard shortcuts to resize your brush: Command-] (PC: Ctrl-]) will
               make it larger; Command-[ (PC: Ctrl-[) will make it smaller.