
Page 79 - Photoshop for Lightroom Users – Scott Kelby 2nd Edition
P. 79
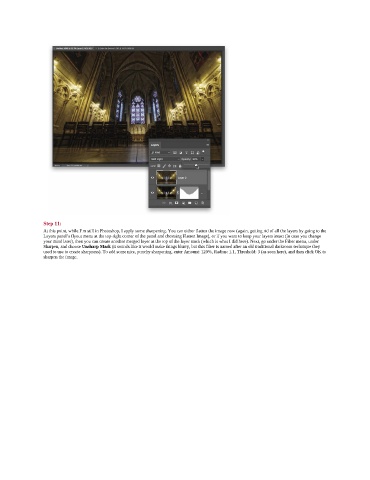
Step 11:
               At this point, while I’m still in Photoshop, I apply some sharpening. You can either flatten the image now (again, getting rid of all the layers by going to the
               Layers panel’s flyout menu at the top-right corner of the panel and choosing Flatten Image), or if you want to keep your layers intact (in case you change
               your mind later), then you can create another merged layer at the top of the layer stack (which is what I did here). Next, go under the Filter menu, under
               Sharpen, and choose Unsharp Mask (it sounds like it would make things blurry, but this filter is named after an old traditional darkroom technique they
               used to use to create sharpness). To add some nice, punchy sharpening, enter Amount: 120%, Radius: 1.1, Threshold: 3 (as seen here), and then click OK to
               sharpen the image.