
Page 83 - Photoshop for Lightroom Users – Scott Kelby 2nd Edition
P. 83
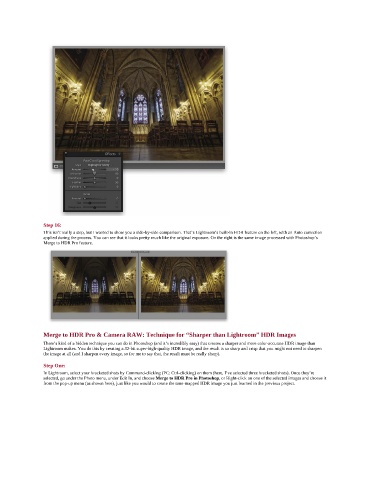
Step 16:
               This isn’t really a step, but I wanted to show you a side-by-side comparison. That’s Lightroom’s built-in HDR feature on the left, with an Auto correction
               applied during the process. You can see that it looks pretty much like the original exposure. On the right is the same image processed with Photoshop’s
               Merge to HDR Pro feature.


               Merge to HDR Pro & Camera RAW: Technique for “Sharper than Lightroom” HDR Images
               There’s kind of a hidden technique you can do in Photoshop (and it’s incredibly easy) that creates a sharper and more color-accurate HDR image than
               Lightroom makes. You do this by creating a 32-bit super-high-quality HDR image, and the result is so sharp and crisp that you might not need to sharpen
               the image at all (and I sharpen every image, so for me to say that, the result must be really sharp).
               Step One:
               In Lightroom, select your bracketed shots by Command-clicking (PC: Ctrl-clicking) on them (here, I’ve selected three bracketed shots). Once they’re
               selected, go under the Photo menu, under Edit In, and choose Merge to HDR Pro in Photoshop, or Right-click on one of the selected images and choose it
               from the pop-up menu (as shown here), just like you would to create the tone-mapped HDR image you just learned in the previous project.