
Page 81 - Photoshop for Lightroom Users – Scott Kelby 2nd Edition
P. 81
panel, to zero out all the sliders. Next, drag the Exposure slider over to the right to around half a stop or so brighter (here, I dragged it over to 0.61, so just a
little brighter than half a stop). Now, paint over some of the ceiling areas to bring them out a bit. I also ended up painting over the backs of the chairs—it
seems like they could be a half stop brighter, too.
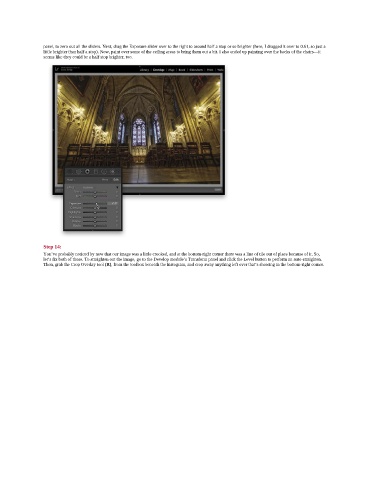
Step 14:
You’ve probably noticed by now that our image was a little crooked, and at the bottom-right corner there was a line of tile out of place because of it. So,
let’s fix both of those. To straighten out the image, go to the Develop module’s Transform panel and click the Level button to perform an auto-straighten.
Then, grab the Crop Overlay tool (R), from the toolbox beneath the histogram, and crop away anything left over that’s showing in the bottom-right corner.