
Page 75 - Photoshop for Lightroom Users – Scott Kelby 2nd Edition
P. 75
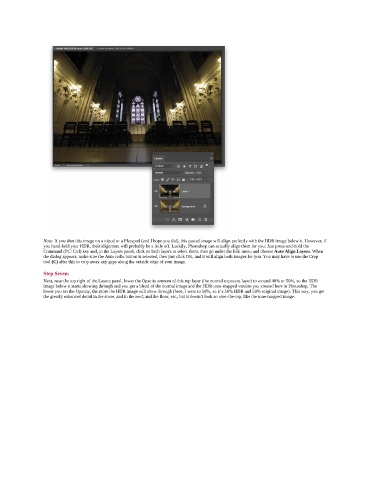
Note: If you shot this image on a tripod or a Platypod (and I hope you did), this pasted image will align perfectly with the HDR image below it. However, if
               you hand-held your HDR, their alignment will probably be a little off. Luckily, Photoshop can actually align them for you: Just press-and-hold the
               Command (PC: Ctrl) key and, in the Layers panel, click on both layers to select them, then go under the Edit menu and choose Auto Align Layers. When
               the dialog appears, make sure the Auto radio button is selected, then just click OK, and it will align both images for you. You may have to use the Crop
               tool (C) after this to crop away any gaps along the outside edge of your image.
               Step Seven:
               Next, near the top right of the Layers panel, lower the Opacity amount of this top layer (the normal exposure layer) to around 40% or 50%, so the HDR
               image below it starts showing through and you get a blend of the normal image and the HDR tone-mapped version you created here in Photoshop. The
               lower you set the Opacity, the more the HDR image will show through (here, I went to 50%, so it’s 50% HDR and 50% original image). This way, you get
               the greatly enhanced detail in the stone, and in the roof, and the floor, etc., but it doesn’t look so over-the-top, like the tone-mapped image.