
Page 42 - Barbara Merry - The Splicing Handbook
P. 42
third strand then leads over the second strand and down through the bight
formed in your first step. The crown is now complete; draw it up tightly.
Remove the tape or seizing. For the first round of tucks, raise a strand on the
standing part of the line and insert any adjacent working strand under it. You can
usually do this with your fingers, but if the rope is twisted too tightly, use a
Swedish fid.
Tuck a working end over the strand you just tucked under, and under the
strand just below it.
Turn the entire piece over. You have one working strand left to tuck, and there
is one strand left in the standing part of the rope that doesn’t have a working
strand under it. Make this tuck, continuing to work counter to the lay of the rope.
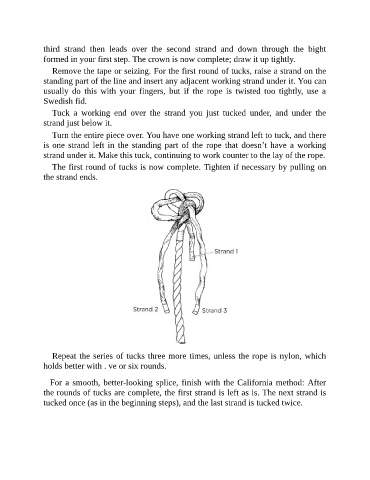
The first round of tucks is now complete. Tighten if necessary by pulling on
the strand ends.
Repeat the series of tucks three more times, unless the rope is nylon, which
holds better with . ve or six rounds.
For a smooth, better-looking splice, finish with the California method: After
the rounds of tucks are complete, the first strand is left as is. The next strand is
tucked once (as in the beginning steps), and the last strand is tucked twice.