
Page 118 - QR CIMAR LASER SCREED
P. 118
11 Semi-Automatic Calibration
About This procedure is unique to the Rugby lasers and uses the digital readout of the Rod
Eye 180 receiver to measure, then adjust the plane of each axis. This procedure is an
Description alternative to the traditional method described in "10 Accuracy Adjustment".
Setup
Objective: To rotate the laser to all four axes, then allow the receiver to adjust the
beam automatically.
Step Description
1.
Pair the receiver to the laser (if not already done). Refer to "5.3 Pairing the
2. Rod Eye 180 with the Rugby 870/880" for more information.
3.
4. Mount the laser on a flat, level surface or tripod.
5. Turn on the laser and align the X-axis toward the receiver position.
6. Mount the receiver to a fixed position (e.g., a stationary grade rod) approx-
7. imately 30 meters (100 ft) from the laser.
8. Turn on the receiver and position the height of the receiver near or at the
on-grade position. It is not necessary to be exact.
Turn off the receiver.
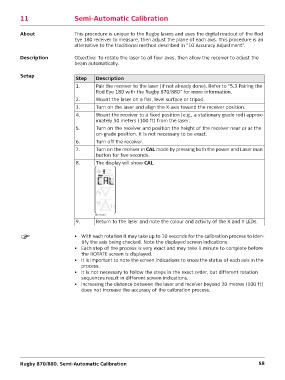
Turn on the receiver in CAL mode by pressing both the power and Laser man
button for five seconds.
The display will show CAL.
004749_001
9. Return to the laser and note the colour and activity of the X and Y LEDs.
• With each rotation it may take up to 10 seconds for the calibration process to iden-
tify the axis being checked. Note the displayed screen indications.
• Each step of the process is very exact and may take 1 minute to complete before
the ROTATE screen is displayed.
• It is important to note the screen indications to know the status of each axis in the
process.
• It is not necessary to follow the steps in the exact order, but different rotation
sequences result in different screen indications.
• Increasing the distance between the laser and receiver beyond 30 metres (100 ft)
does not increase the accuracy of the calibration process.
Rugby 870/880, Semi-Automatic Calibration 58